Tuesday, October 14, 2014

Welcome to Berkeley Square!

Last week I started the center block for the brand new collection from Sarah Vedler - "It's A Sterling Life on Berkeley Square".  You can find the pictures for this collection on here website here.

       Bernina 880 Sterling Edition It's a Sterling Life on Berkeley Square 1

Sterling Edition Quilt
  • Finished size 77” x 77”
  • Compatible with 7 Series or 8 Series machine using the maxi or jumbo hoop

This is close-up of the center block of the quilt.

                                It's a Sterling Life on Berkeley Square by Sarah Vedeler Designs   


You will receive this collection when you purchase the Bernina 880 Sterling Edition ( coming out soon!) or you can purchase the CD today from the Bernina Sewing Center in Tampa, FL.  I will be stitching my project on my signed 830LE Edition.

                   Bernina 880 Sterling Edition 4  
Bernina 880 Sterling Edition Includes:
  • Exquisite Faceplate Design
  • “It’s a Sterling Life on Berkeley Square”, quilt and embroidery design collection created for BERNINA by Sarah Vedeler
  • “It’s a Sterling Life” Embroidery Kit
  • Ornamental silver plate for engraving and adhering to the machine
  • Invitation to an exclusive 3-day Sterling Retreat at the BERNINA Creative Center with special guest Sarah Vedeler
  • Special accessory and software offers included
  • PaintWork Tool
  • CutWork Tool
  • CrystalWork Tool
  • Rotary Punch Tool
  • Rotary Punch Needle Plate
  • Commemorative Holiday Ornament
One of our customers (thank you Betsy) suggested to me that I start blogging my stitching progress and so I decided that would be a terrific idea!  I usually stick with the original color wave when I start a huge project such as this.  It saves me from buying twice as much fabric!

Step 1 - Selecting the fabric, threads and stabilizers.

The main fabric that I selected is "Dimples" By Andover Fabrics (color C2).  It is a great tone-on-tone blue grey and perfect match for this collection.

The brights I selected are from the Jazz Basic collection by Timeless Treasures.  Here are a few of the colors that I selected.


Sarah's instructions included the Aurifill threads but I selected mainly Floriani threads for my project.
                                                        Floriani 40wt Polyester Embroidery Thread width=184 height=184
Here are my color matches for the quilt:
Black - Floriani 900
Lemon - Floriani 501
Yellow - Floriani 523
Pale Yellow- Floriani 521
Dusty Orange - Floriani 172
Burnt Orange - Floriani 755
Light Leaf Green - Floriani 2015
Olive - Floriani 210
Fuschia - RA 5560
Light Magenta - RA 5561


The stabilizers i selected are:

Floriani Medium Tear Away
                                                                            Floriani Appli-Kay
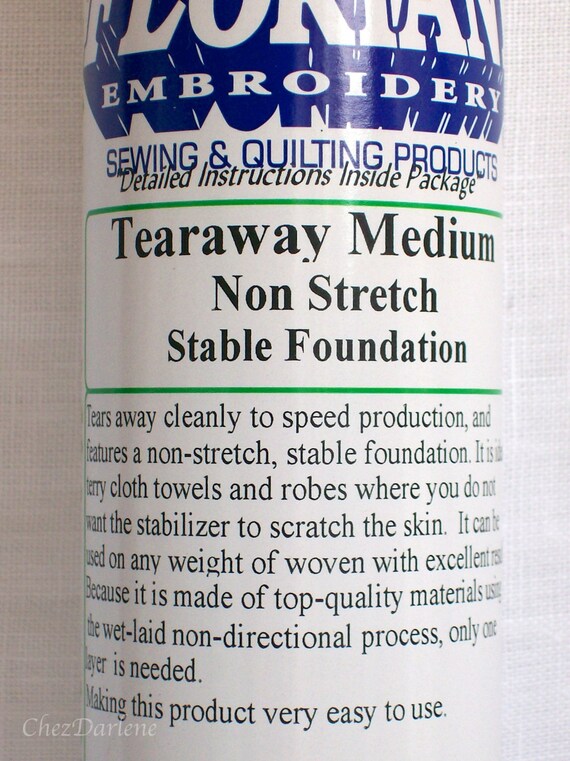
Tearaway Black Medium Stabilizer - Machine Embroidery Non Stretch Stabilizers - Stabilizes Towels, Robes and Woven FabricImage - Package Front


I hope you join me on this blogging journey.  Please come back often and now it is back to stitching!

and sew on....
Adeline          


Friday, August 15, 2014

Quilting on your Bernina


This Bernina video features the quilt function of the Bernina sewing machines.  A great tutorial which highlights the best tools to improve your quilting experience.

Check it out!

Sunday, August 10, 2014

Bernina DesignWorks Project

Amanda Murphy posted this photo album cover in 2012.  I thought it was worth revisiting for this blog post.  I have also included a quick video to use for inspiration on your next DesignWorks project.


Click on the link here and it will take you to her post.


Friday, July 4, 2014

Video Tutorials for the Bernina 350

I cam across this link today and I thought it would be valuable to many of the ladies who have recently purchased this machine.  It is always nice to have a refresher video when you have a questions.

BERNINA B 350   


         Bernina 30 Sewing Mastery

Tuesday, April 29, 2014

Ladybugs in my Garden Table Runner

I recently taught the Spring  "Tool Time' class at the Bernina Sewing Center in Tampa, Fl.  I found this design in the McCall's Quilting Magazine here...  I purchased the digital version and began my journey of adapting this design using the Bernina DesignWorks Software and tools found here

The original table runner looks like this...

My version is slightly different and a used a Bernina DesignWorks Collection as well as creating my own cutwork designs.

The collection I used was 21010DW Citrus Blossoms.  I thought it was a perfect complement to the original design.


Here is a closeup of the table runner...  My March 2014 DesignWorks class was learning how to create the basic shapes using the DW software.  Here  are a few more pics...


Isn't this lady bug sooo cute?


Contact your local dealer for the Bernina DesignWorks Software and Tools.  No local dealer?,  feel free to contact the Bernina Sewing Center in Tampa, Fl at www.berninapfaff.com


Sunday, April 6, 2014

DesignWorks Tutorial

Sarah Vedeler has a great tutorial on her website in using CrystalWorks...yeah!  I wish we had more of these on the WeAllSew blog!

Here is her new collection...Jazzilicious

You can order this design collection from the Bernina-Pfaff Sewing Center in Tampa, Fl!

You can learn how to create this design from the DesignWorks class at the Bernina-Sewing Center!  Come join us!


DesignWorks class on April 14th - Bitmaps, ClipArt and Dingbats, oh my!

Tuesday, February 25, 2014

Bernina V7 class sample

I recently taught a class on the Bernina V7 software following the directions from the Dimensional Elements webinar.  It was an awesome class and I have a few photos that I would like to share with my V7 friends...

Here is the table runner that I created using fabric leftover from my kitchen window treatments.


I used the Ecco design collection to create the Stumpwork leaf in the software. I used a #26 gauge wire and then used the Cutting tool to cut out around the leaf.


Here is a close-up of the dimensional leaf stitched onto the table runner.

The next element was the Punchwork leaf....


I used a wool blend yarn on the felt to create the dimensional leaf.  The Cutwork flower design is also shown in this picture - sooo easy with the Cutwork tool!

The last tile that I did was the Raised Satin stitch - it turned out beautifully! Unfortunately you can only see the one center of the flower below...

I absolutely LOVE the idea of editing existing embroidery designs and turn them into a work of art! ..... This is WHY I bought a BERNINA!